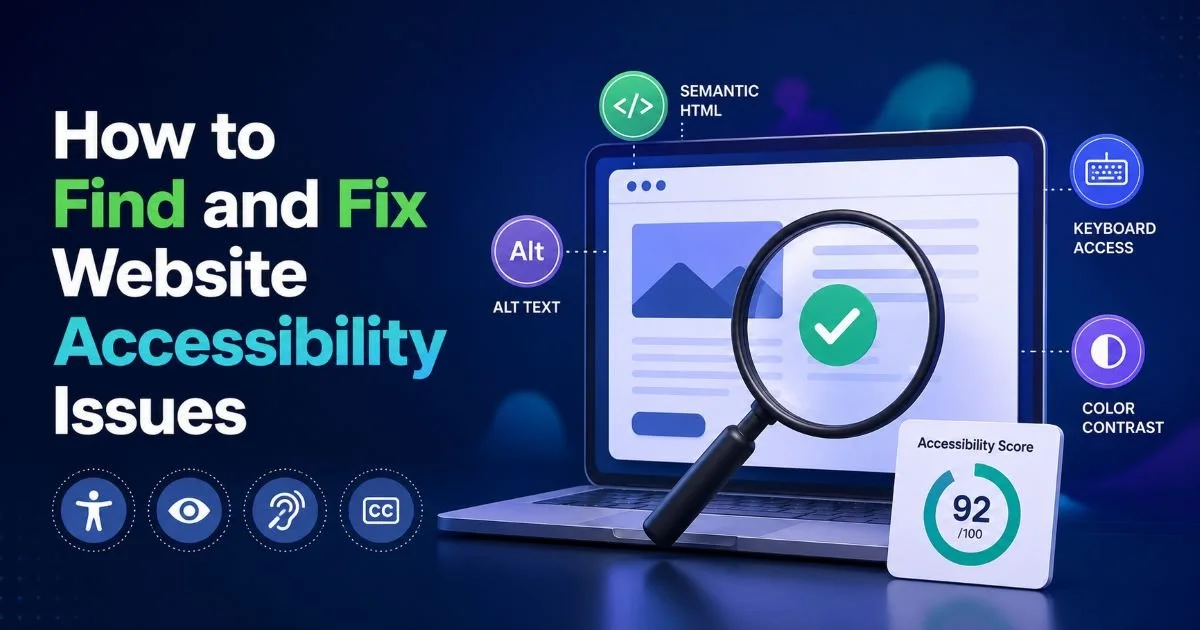
Website accessibility issues affect far more sites than most developers realize. Recent surveys suggest that over 96% of the top one million homepages have detectable WCAG failures, ranging from missing alt text to broken keyboard navigation. For web designers and developers, these aren't just compliance checkboxes; they directly shape how real people experience your work.
A single unlabeled form field can block a screen reader user entirely. A low-contrast button might be invisible to someone with a vision impairment. This guide walks you through a practical, repeatable process to find website accessibility issues across your pages and deliver clear, actionable fixes that improve usability for every visitor.
Key Takeaways
- Automated tools catch roughly 30% of accessibility errors; manual testing covers the rest.
- Prioritize fixes by severity: focus on blockers that prevent users from completing tasks first.
- Run your accessibility audit on templates, not just individual pages, to scale corrections efficiently.
- Keyboard navigation testing reveals interaction problems that scanners frequently miss entirely.
- Document every fix with before-and-after evidence to build team accountability over time.
Step 1: Run an Automated Scan to Surface Website Accessibility Issues
Choosing the Right Scanner
Start with a page accessibility checker that crawls your site and flags violations against WCAG 2.1 AA criteria. Tools like axe DevTools, WAVE, and Lighthouse each have strengths. Axe integrates directly into Chrome DevTools and catches issues in dynamically rendered content. WAVE offers a visual overlay that helps designers see problems in context. Lighthouse provides a score that's useful for quick benchmarking, though it tests fewer rules. Pick one primary tool and supplement with a second to reduce blind spots.
Run scans in both light and dark mode if your site supports theme switching, contrast ratios change between them.
Interpreting Scan Results
Automated scanners typically categorize findings as errors, warnings, or notices. Errors are confirmed WCAG violations: a missing form label, an empty heading, and an image without alt text. Warnings indicate probable issues that need human judgment, like potentially insufficient color contrast on certain backgrounds. Notices flag areas worth reviewing, but not necessarily broken. Focus your energy on errors first; they represent the clearest website accessibility issues with the most straightforward fixes.
When scanning a large site, don't test every page individually. Instead, identify your unique templates homepage, product page, blog post, contact form, and scan one representative of each. Most accessibility errors originate in shared components like headers, footers, and navigation menus. Fixing a broken nav link pattern in one template corrects it across hundreds of pages. If you're building sites with tools like those covered in this HTML website builder roundup, pay attention to the default markup those tools generate, since they often produce accessibility gaps you'll need to override manually.
Step 2: Conduct Manual Testing for Issues Automation Misses
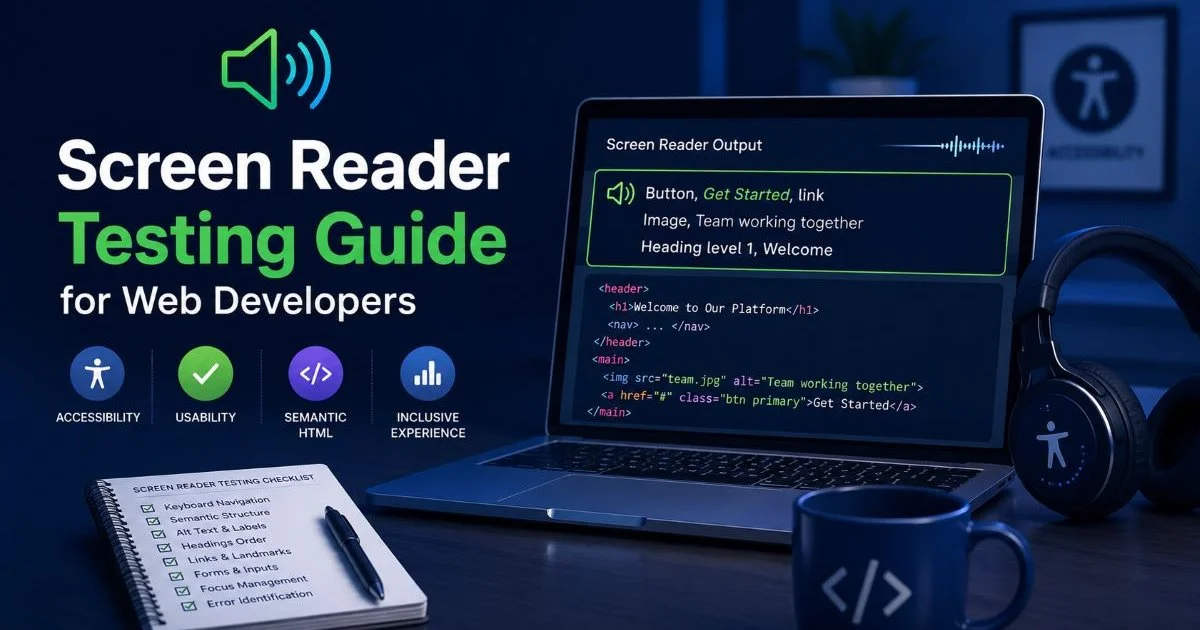
Keyboard and Screen Reader Checks
Automated tools are powerful but limited. They reliably catch about 30% of all accessibility barriers. The remaining 70% require human judgment, understanding context, evaluating reading order, and testing actual interaction flows. Start with keyboard-only navigation: unplug your mouse, open your site, and press Tab through every interactive element. Can you reach every link, button, and form input? Does focus move in a logical order? Is the focus indicator visible? These questions reveal interaction-level problems no scanner can detect.
A visible focus indicator is a WCAG 2.4.7 requirement. Never use `outline: none` without providing an alternative focus style.
Next, fire up a screen reader. VoiceOver on macOS, NVDA on Windows, and TalkBack on Android are all free. Navigate your key user flows: find a product, fill out a form, read a blog post. Listen for confusing announcements, links that say "click here" with no context, images announced as "image" with no description, or form fields with no programmatic label. These tests give you ground truth about how assistive technology users actually experience your site. Screen reader testing is the single most revealing step in any accessibility audit.
Cognitive and Visual Review
Beyond assistive technology, evaluate your design for cognitive accessibility. Are error messages clear and specific? Does the site use plain language? Can users undo destructive actions? Check that content isn't conveyed through color alone; a red-outlined input field should also display a text message explaining the error. Review animation: Does your site respect the prefers-reduced-motion media query? Roughly 35% of adults report sensitivity to motion, and auto-playing animations can trigger real physical discomfort for users with vestibular disorders.
"Accessibility isn't a feature you add at the end, it's a quality standard you build into every decision."
Zoom the browser to 200% and verify that no content gets clipped, overlapped, or hidden. Check that text reflows properly, and horizontal scrolling isn't required. These usability improvements benefit everyone, not just users with disabilities. Someone on a small laptop, a person browsing on a phone in bright sunlight, or a developer reviewing code on a narrow split-screen window all benefit from responsive, well-structured layouts that handle magnification gracefully.
Step 3: Prioritize and Fix Accessibility Errors by Impact
Building a Fix Queue
Not all issues carry equal weight. A missing skip-navigation link is inconvenient; a form that can't be submitted via keyboard is a complete blocker. Categorize your findings into three tiers: critical (prevents task completion), serious (causes significant difficulty), and moderate (creates friction but has workarounds). Address critical issues in your current sprint. Schedule serious issues within the next release cycle. Batch moderate issues into a dedicated cleanup sprint. This tiered approach lets you fix accessibility errors without derailing other project work.
Some teams use CVSS-style severity scoring adapted for accessibility. A simple High/Medium/Low system works fine for most projects.
For each issue, write a specific ticket that includes the page URL, the element affected, the WCAG criterion violated, and the exact fix required. "Add alt text to images" is too vague. "Add descriptive alt text to the hero image on /pricing (currently alt=""); describe the product dashboard screenshot" is actionable. Specificity reduces back-and-forth and helps junior developers learn accessibility patterns as they work through the queue.
Common Fixes Reference
When correcting color contrast, use tools like the WebAIM contrast checker or the built-in contrast ratio inspector in Chrome DevTools. Don't just darken text arbitrarily; work with your design system's color tokens to find the nearest compliant shade. For missing form labels, avoid using placeholder text as a substitute; placeholders disappear on input and fail WCAG 1.3.1. Proper <label> elements with for attributes remain the most robust solution across assistive technologies and browsers.
ARIA attributes are helpful but overused. The first rule of ARIA is literally "don't use ARIA" if a native HTML element achieves the same result. A <button> is always better than a <div role="button">. Native elements carry built-in keyboard support, focus management, and screen reader semantics. Reach for ARIA only when building custom widgets like tab panels, comboboxes, or tree views where no semantic HTML equivalent exists. Misapplied ARIA can make accessibility worse, not better.
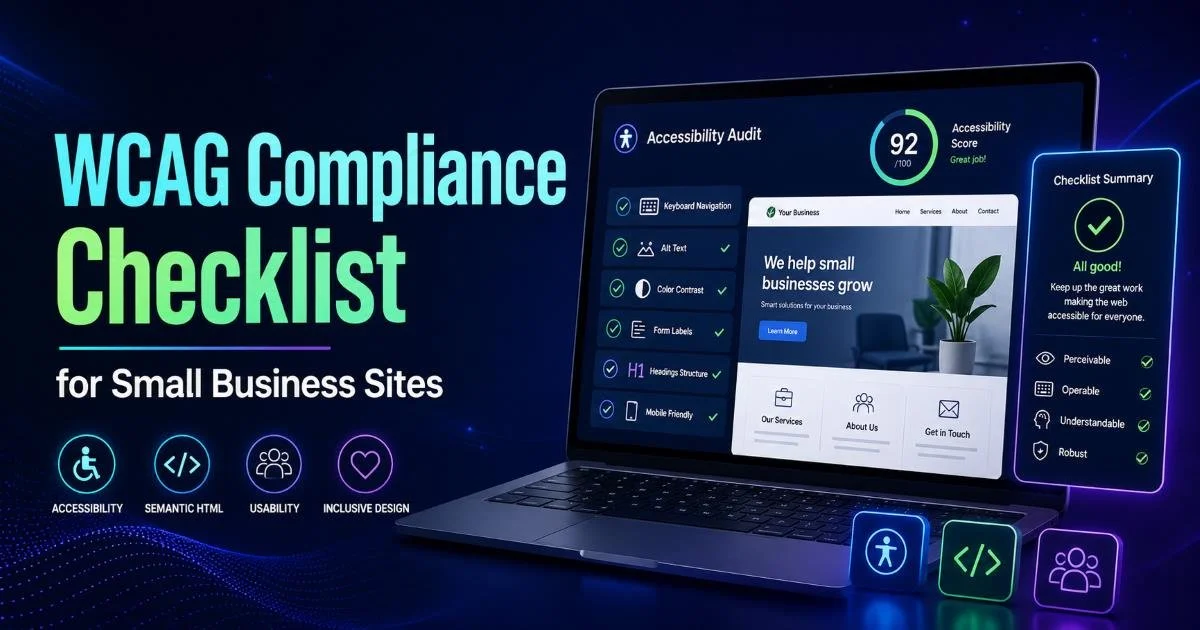
Step 4: Verify, Document, and Maintain WCAG Compliance
Regression Testing
After applying fixes, re-run your automated scans and repeat your manual checks. Accessibility work isn't done until you've verified the fix actually resolves the issue for real users. Test with the same screen reader you used during discovery. Confirm keyboard focus order is intact. Check that your contrast fixes render correctly across browsers. Firefox and Chrome sometimes handle font smoothing differently, which can affect perceived contrast ratios. If a fix introduces a new problem, you want to catch it now, not after deployment.
Add axe-core to your CI/CD pipeline so new code gets scanned automatically on every pull request.
Integrate accessibility checks into your development workflow permanently. Linting tools like eslint-plugin-jsx-a11y catch issues at the code level before they ever reach a browser. Automated end-to-end tests using Cypress or Playwright can assert that critical elements have proper ARIA labels and keyboard support. These automated guardrails prevent regressions and catch new website accessibility issues the moment they're introduced. Treat accessibility like performance, something you monitor continuously, not audit once a year.
Building a Culture of Accessibility
Document your findings, fixes, and testing methodology in a shared knowledge base. When a new team member joins, they should be able to understand your accessibility standards, see past audit results, and follow established patterns. Create a component library where buttons, forms, and modals are accessible by default. This shifts the burden from individual developers remembering rules to the system enforcing them. Over time, your usability improvements compound as each project starts from a stronger baseline.
Publish an accessibility statement on your site that describes your current conformance level, known limitations, and how users can report problems. This isn't just good practice, it's a legal expectation in many jurisdictions. The statement builds trust with users and demonstrates that your team takes accessibility seriously. Update it whenever you complete a major audit cycle or resolve significant issues. Transparency about your progress matters more than claiming perfection. Real WCAG compliance is an ongoing commitment, not a one-time certification.

Frequently Asked Questions
?How do I test keyboard navigation for accessibility issues?
?Is Axe DevTools or WAVE better for finding WCAG failures?
?How long does a full accessibility audit typically take?
?Does fixing automated scan errors mean my site is fully accessible?
Final Thoughts
Finding and fixing website accessibility issues is a skill that improves with practice, not a burden to endure. Start with automated scans, deepen your understanding through manual testing, prioritize fixes by real user impact, and build systems that prevent regressions. The process described here works whether you maintain a single marketing site or manage dozens of client projects. Every fix you ship makes the web more usable for someone who was previously excluded, and that's work worth doing well.
Disclaimer: Portions of this content may have been generated using AI tools to enhance clarity and brevity. While reviewed by a human, independent verification is encouraged.